Wednesday, February 9, 2011

The Lunch Box Series. Part III.

I've been asked several times if I think sushi is healthy.

Well, it can be. If you get the vegetarian version, it's definitely not unhealthy.

And if you make my version, it's incredibly healthy and easy. And portable. Win!

I never realized that nori (edible seaweed) was readily available and so nutritious! It contains as much protein as soybeans and is full of dietary fiber and vitamins.

I actually got the idea to use nori from Gena's portable nori snack. She also made a sunflower seed pate to spread inside the nori. I made this dip as soon as I saw the recipe (with some subtle changes to the original recipe such as eliminating the tahini). This was a really quick and easy dip to prepare, and I recommend trying it, especially if you aren't a fan of hummus!

I was inspired by Gena's recipe to incorporate nori into one of my portable lunch ideas! I made sushi wraps with nori, sunflower seed dip, and various sliced vegetables (carrots, cucumbers, bell peppers, and avocado).


Even though the nori seems fragile, it's not! Don't be afraid to load it with fillings.


And it stays together so nicely! I'd still suggest wrapping it with foil or keeping it in a tight container, though.


This is also heartier than it seems. I was quite surprised! It might have been the sunflower seed dip (sunflower seeds are a good form of protein). Actually, any spread could work in this wrap including some I've previously featured such as pesto, guacahummus, or regular hummus.

Wraps in general are another healthy portable lunch option. If you don't have nori, collard greens or tortillas will work just as well!

Tuesday, February 8, 2011

The Lunch Box Series. Part II. (& Happy 100th!)

I am pleased to announce that this is my 100th post on TFG. Hooray!

This is what I ate for lunch today. Aren't they cute?


And they take about 10 minutes to prepare.

Jalapeno Cheddar Muffins

Ingredients: (Makes 10 muffins)
  • 2 eggs
  • 3/4 cup milk
  • 1/2 cup shredded cheddar cheese (can use more, if desired)
  • 1/2 cup whole wheat flour
  • 1/4 cup oats
  • 1/2 large jalapeno, chopped
  • 1 cup frozen broccoli, thawed
  • 1 cup fresh spinach (optional)
  • 1 teaspoon baking powder
  • 1/2 teaspoon baking soda
  • 1 tablespoon melted butter (I used Smart Balance)
  • salt/pepper/oregano to taste

In a bowl, beat the eggs and stir in the milk and cheese.


Add the broccoli and jalapeno.


Slowly add the flour and mix thoroughly until the consistency is dough-like. Then add the oats and melted butter.


Add the baking soda and baking powder. At this point, I decided to add the spinach. Because well...in my opinion, spinach goes well with everything.


Season with salt, pepper, and oregano. Pour batter into muffin tray. Don't forget the non-stick spray!


Bake at 350F for 20 minutes. I suggest doing the clean knife trick to make sure they're actually done!


I really like the way these turned out! Quite moist and quite spicy thanks to that jalapeno.


Yum. I took some of these to school with me for lunch today, along with a bag of chopped carrots...

...with a dollop of guacahummus!

Quick and easy lunch--and these muffins don't need to be microwaved, so they're a perfect portable meal.

And I can't end this post without sharing my awesome dinner. I thought of this while I was studying at my favorite coffee shop today. 

Spicy Pesto Pizza Nachos

Ingredients:
  • corn tortilla chips (or you can bake your own!)
  • several spoonfuls of pesto
  • 1 tomato, chopped
  • 1/2 bell pepper, chopped
  • 1/4 jalapeno, chopped
  • shredded cheese of choice (I used parmesan and cheddar)

I baked three corn tortillas (torn apart first!) and assembled them on a plate and topped them with the rest of the ingredients.


Either bake or microwave these. I baked them for a few minutes before getting impatient, so I proceeded to microwave them. 


This is the best idea I've had all day. Just sayin'.

Monday, February 7, 2011

The Lunch Box Series. Part I.

What did you eat for lunch today?

Really, I want to know. I think I'm going to start doing the "daily question" thing at the end of each of my posts to get more reader involvement. What do you guys think? (Two questions already!)

As I mentioned yesterday, I will be focusing on portable lunch items for this week. This has really forced me to get my creative juices flowing. Unfortunately, today's lunch wasn't all that creative. But just wait, we have five days worth of lunches to discuss!

I thought I'd start this series with a good ol' sandwich. Don't worry though, it's not a PB&J (I'm allergic to PB, sigh). It's not an AB&J either (although that's what I've been eating for lunch almost everyday for the past six months)...

I toasted two slices of whole grain bread and spread a generous amount of guacahummus on each slice. I topped one slice with fresh mozzarella and the other with fresh spinach. I originally wanted to add some tomato slices, but that would have become a portable soggy mess.


I also brought this shiny green apple to accompany my sandwich.


And there you have it--my super simple lunch that took five minutes to prepare this morning.

Tomorrow's lunch is much more interesting...I cannot wait to share it with you! Hint: I ate it for dinner today.

So don't leave me hanging! What did you eat for lunch today?

Sunday, February 6, 2011

Guaca--what?

It's kind of a coincidence that I decided to make this on Superbowl day. I didn't actually plan for that to happen.

Earlier this week, I bought some avocados because they, for some reason, were on major sale. I was also planning on making hummus this week. I then thought why not make avocado hummus?!!?

I thought I was sooo innovative. Until I typed this into Google and found that this had already been done. A lot. It's a huge hit.

Oh well, I can still say that I came up with the idea on my own. And I like the name guacahummus. It's a super dip if you ask me. Two already healthy/tasty dips combined into one!

Guacahummus

Ingredients:
  • 1 avocado
  • 1 can garbanzo beans, drained
  • 1 tablespoon tahini
  • 2 garlic cloves
  • 3 tablespoons olive oil (can add more if necessary)
  • 2 tablespoons lemon juice
  • salt/pepper to taste

Combine all ingredients in the food processor.


Side note: I added the olive oil one tablespoon at a time, usually after pausing to scrape the sides of the food processor. Also, the salt/pepper will vary depending on your taste, so I suggest adding that a little at a time as well.


Creamy! There were some small avocado chunks in the finished product, but that made it even more guacamole-esque.


My Superbowl-inspired lunch. (Just kidding). I tore apart a few small corn tortillas and baked them for about 7 minutes (or until slightly browned). I let them sit out while I made the guacahummus, so by the time I was done, the chips were nice and crunchy!


Can't forget the salsa, either!!

I've been hearing all about homemade coconut cream, from all kinds of bloggers. I decided to take matters into my own hands and try it out for myself. I found coconut flour in bulk so I bought just a small amount to experiment with.

Basically, just combine a spoonful of coconut flour with any kind of milk until the consistency is cream-like. 

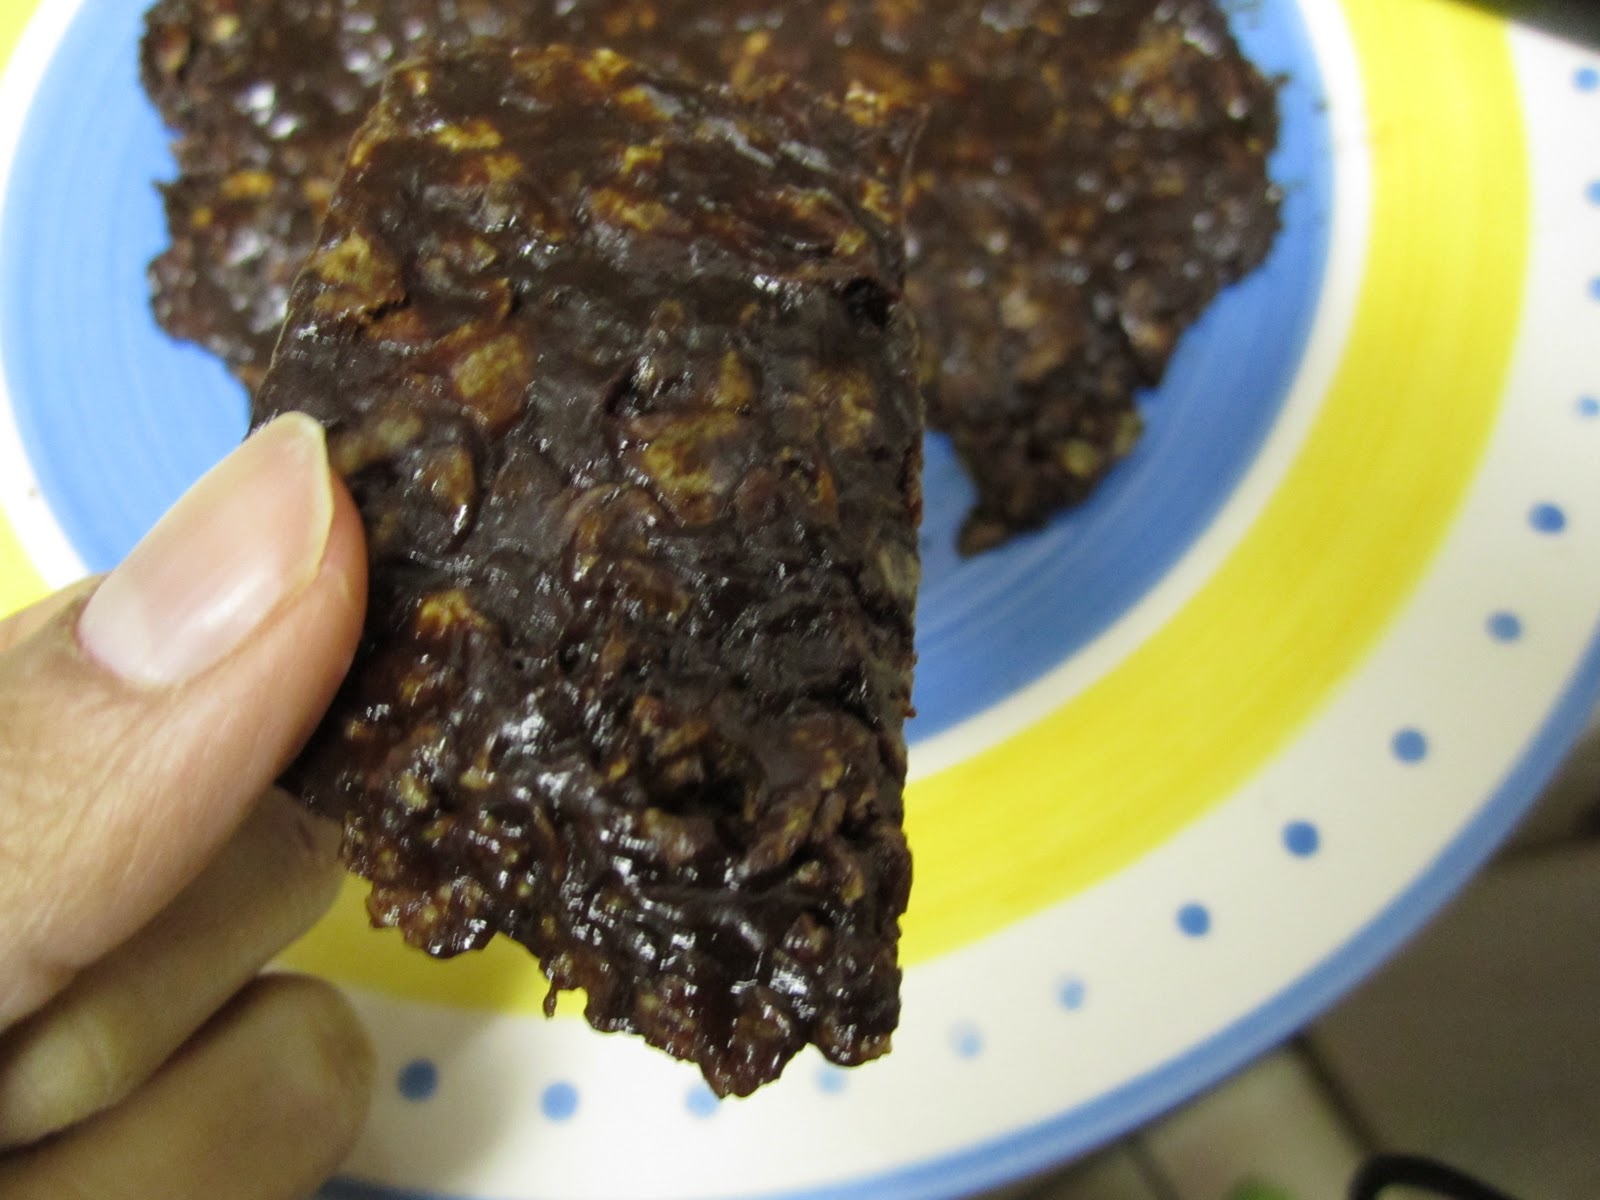
Guess what I tried it on? My post-lunch dessert (aka choco crispies)!


It worked so well as frosting! 

Since I'm sure you are in suspense about this week's exciting recipes (heh) I will reveal this week's theme. Everyday this week, I will be featuring a different healthy lunch item that is portable! I've really begun to get bored of my almond butter sandwiches everyday at school, so that's why I'm especially excited.

Also, I love getting feedback from readers! (In fact, the portable lunch idea was suggested by a reader). If you want to see a particular recipe or anything at all, feel free to let me know and I will do my best to post about it!

Saturday, February 5, 2011

Dessert for one.

It's been quite a while since I've posted a dessert recipe. That's pretty ironic considering I have the biggest sweet tooth in the world!

Have I mentioned I complete every meal with something sweet? I think I forgot to mention that small detail.

This definitely fulfills the sweet tooth. So if you have one too, you're in luck! This no-bake recipe is super quick and super tasty.

Choco Crispies [Inspired by Angela's recipe.]

Ingredients:
  • 1 cup crisp cereal (I used grape nut flakes)
  • 1/4 cup SunButter
  • 1/4 cup brown rice syrup
  • 1/4 cup cocoa powder
  • 1/8 cup milk (I used almond)
  • 1/2 teaspoon vanilla
  • 1/8 cup chocolate chips
  • pinch salt

Heat brown rice syrup, SunButter, vanilla, and milk in a pot over medium heat.


When the consistency becomes uniform, add the cocoa powder and a pinch of salt.


Stir until the cocoa is completely mixed in.


Add the cereal and chocolate chips. Fold into the chocolate mixture.


Transfer to a pan. I used a plate instead since this makes a small amount! Spread the mixture evenly. 


Cover and keep in the freezer for at least 10 minutes. And then cut yourself a piece!


It's a gooey, chewy bar that still maintains a crunch from the cereal.


I made mine flat, but you can definitely make it a little taller. Either way, this is quite the mouthful of chocolate! 

This week, starting tomorrow, I will be featuring a theme completely different from a veggie of the week. I'm so excited to share the recipes with you! It'll be different, but especially useful for us students :). Stay tuned!

Thursday, February 3, 2011

Move Over, McDonalds! (Part II).

I finally finished the brown rice pudding. It lasted me three breakfasts. And I'm definitely planning on making it again!

However, I'm still on this weird breakfast experimenting spree. So yesterday, I decided that my next breakfast would be a smoothie.

Well that was a big fail. This morning, it was 17 degrees but felt like FOUR. ??? I don't think I've ever experienced weather in the single digits.

Needless to say, I was not in the smoothie mood. My insides already felt frozen without consuming a frozen beverage.

Never fear! I still made the smoothie I'd planned to make today, but in the form of a protein shake. It was just as great as I'd envisioned it to be.

Raspberry Creamsicle Protein Smoothie

Ingredients:
  • 1 frozen banana
  • 1/2 frozen avocado
  • 2-3 tbsp frozen raspberries
  • 1.5 cups milk (I used almond because it's creamy)
  • 1 scoop vanilla protein powder


I know the avocado part sounds weird, but the avocado taste is practically invisible! The raspberries have such a strong flavor that it masks pretty much everything else (including the protein powder!). What a fun way to drink protein.

So why exactly am I asking McDonalds to move over? Well, that's because I made some green bean fries today. 

I did lots of research on green bean fries, and the consensus is that they taste like French fries. What a strange concept. I also assumed that making green bean fries involved breading the green beans in some form.

But this is the easiest recipe ever, and I highly recommend making this if you feel the need to consume French fries.

Green Bean Fries

Ingredients:
  • fresh green beans
  • olive oil
  • salt

There really are only three ingredients.

Chopping the green beans is optional. I chopped them in half because they were long. Toss them with olive oil and salt.


Arrange on a baking sheet. Bake at 425F for 15-20 minutes, flipping them after 10 minutes.


Remove from oven when the "fries" have sufficiently browned.


I tried one, expecting it to taste like a French fry. It didn't. (Yet). It was tasty, though.


Then I decided to really put it to the test. I dipped a few of them in ketchup.


And they really tasted like French fries. Something about the crisp outer portion in combination with the soft inner portion dipped in ketchup made my taste buds quite confused. 

So...this is what happened.


Now you really have no excuse not to eat your veggies! Green bean fries and spaghetti squash hash browns? These two recipes alone should have you fulfilling your new year's resolutions in no time!

Tuesday, February 1, 2011

Yet another comfort food. Tulika-fied.

Don't you ever feel the need to eat some form of a delicious and completely unhealthy food when you're stressed out about school?

I do.

And then I get to work and attempt to make something. Today I did just that. Except, I also attempted to make it healthy. I'd like to think it was quite successful.

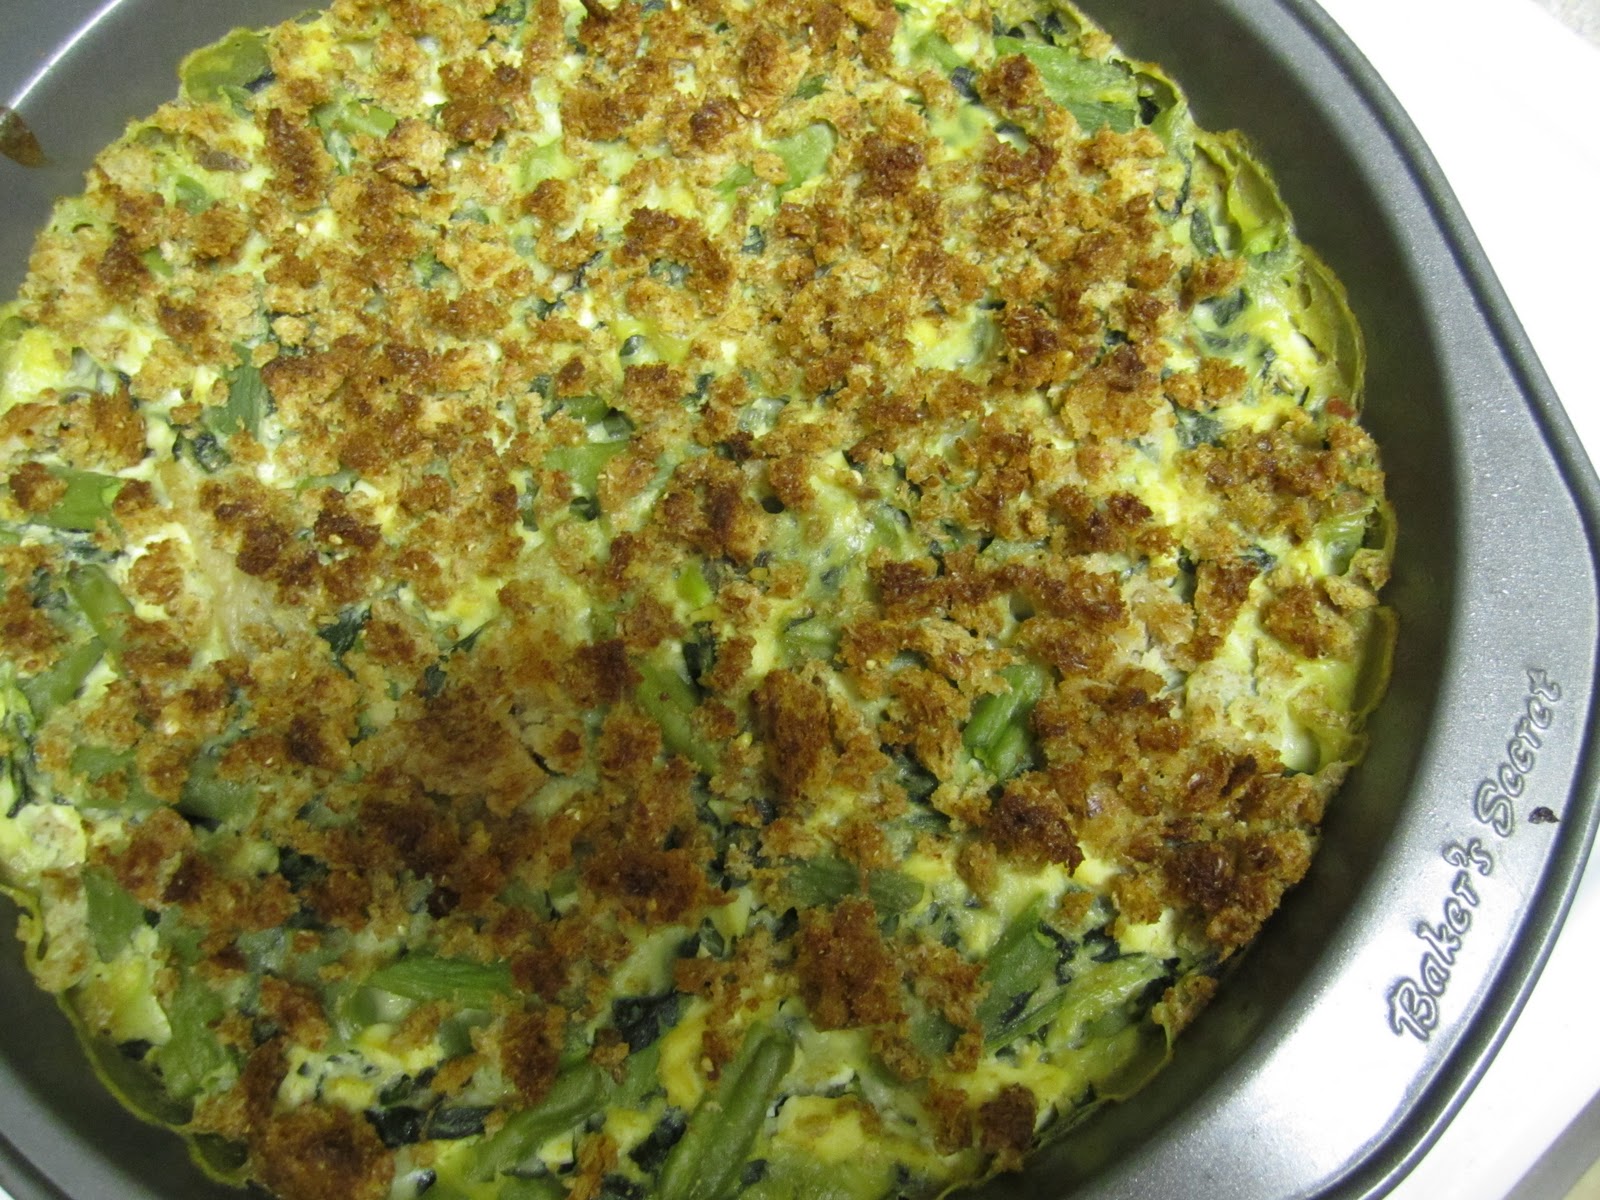
Vegan Green Bean Casserole

Ingredients:
  • fresh green beans, chopped
  • 2 garlic cloves
  • olive oil
  • 1 slice whole grain bread, toasted
  • 1 tablespoon vegan butter (Smart Balance, Earth Balance)
  • 3/4 cup almond milk
  • 1/2 cup water
  • 1 tablespoon nutritional yeast
  • 2 tablespoons flour (I used whole wheat)
  • frozen mushrooms
  • fresh spinach
  • 1/4 block tofu, chopped finely
  • salt/pepper/chili flakes to taste

Boil a pot of water and add salt and chopped green beans. Cover and let cook for 5 minutes.


Then put this into a colander and drain the water. Rinse with cold water and then set this aside.

In a separate pan, heat olive oil and add garlic, mushrooms, and spinach. I would have added more mushrooms, but I ran out of frozen mushrooms. So I added a lot of spinach.


Mix together almond milk, flour, nutritional yeast, salt, pepper, and water. Pour into the pan with the veggies. [Side note: vegetable broth is typically used instead of water, but I didn't have any. So that's why I added nutritional yeast, salt, and pepper--just to enhance the flavor.]


Chop the tofu and add it in to thicken the sauce.


Add the green beans. Stir, then transfer this into a baking dish. Don't forget the non-stick spray!


In a food processor, combine the slice of bread, Smart Balance, salt, and pepper. Blend until crumbled.


Top the green bean mixture with the crumbles.


Bake at 425F for 15-20 minutes.


Crispy and creamy.


I'll admit, I've never actually had green bean casserole. But according to Alyssa, my healthy, vegan version tastes like the real thing, so I'll take her word for it!

This doesn't taste healthy at all. But it is. So you might as well just eat the whole pan. (Just kidding--everything in moderation)!