Sunday, February 27, 2011

Cheeese.

I should have posted this recipe earlier today, because this would be perfect to eat in front of the tv whilst watching the Oscars!


If you like cheese, this recipe is right up your alley. One reason I could never be vegan is because I like cheese too much. Another is that I like yogurt too much.

I've decided to feature broccoli this week, and since broccoli goes oh so well with cheese, well...expect to see a lot of cheese this week. For those of you readers who are vegan, don't worry! There will be some broccoli sans cheese as well. :)

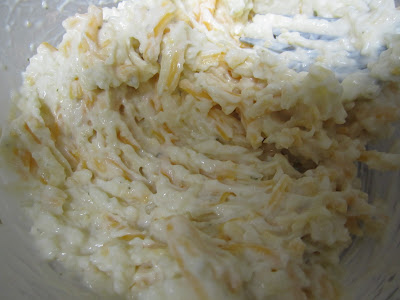
Hot Cheesy Broccoli Dip

Ingredients:
  • 1 small broccoli floret, chopped (can use frozen broccoli instead of fresh)
  • 3 wedges Laughing Cow light spreadable cheese (can substitute cream cheese or other cheese spread)
  • 3/4 cup shredded cheese of choice (I used a combination of 2% Mexican blend and cheddar)
  • 1-2 tablespoons milk of choice
  • 1 teaspoon olive oil
  • 2 cloves garlic
  • optional: 1 cup fresh spinach or other vegetable of choice
  • salt, pepper, paprika to taste

If using fresh broccoli, cook it by steaming or boiling.


Saute the garlic and spinach in olive oil for a few minutes, and then add the steamed broccoli.


Using an immersion blender, roughly blend the broccoli mixture for a more uniform texture. If you don't have a hand blender, don't fret! This step does not have to be done.


In a bowl, add the spreadable cheese and milk. (Here, I used about 1 tablespoon of milk). Mix.


Add the shredded cheese. If this mixture is too thick, add another tablespoon of milk. 


Gradually add the blended broccoli mixture. Season with salt and pepper and mix.


This dish can be either heated in the oven or in the microwave. I was too excited/impatient to wait for the oven time, so I used microwave. (This takes about 1 min 30 seconds in the microwave).

Sprinkle paprika atop the dip, and it is ready!


Serve with toasted bread, tortilla chips, or chopped veggies. 


Mmm...cheesy!

Saturday, February 26, 2011

Ideas, videos, and snacks.

I have failed to mention my newest lunch development. For the past week, I've been using this...


...as a sandwich spread! It is incredibly convenient, and no other condiments are necessary. I've been using one wedge of cheese and lots of fresh spinach as a filling for my sandwiches. 

In fitness news, I have a couple more Zumba videos up from the class I taught yesterday. You may find them here and here. The first one focuses on legs and the second is more dancey. 

I realize I've been slacking on the TurboKick videos lately! Do you have a preference? Would you also like to see other workouts?

---

To conclude snack week, I have a new and improved version of a recipe I have previously shown: crunchy snacky chickpeas

This time, I changed it up to a salty and spicy flavor. I think I prefer this savory batch to the sweet one I made previously. (And this time, the chickpeas didn't burn!)

Crunchy Snacky (Salty&Spicy) Chickpeas

Ingredients:
  • 1 can chickpeas (garbanzo beans)
  • salt
  • pepper
  • paprika
  • olive oil
Preheat oven to 350F.

Rinse the chickpeas and put them in a bowl.

Drizzle olive oil  into the bowl (I used ~1/2 tablespoon). Coat thoroughly, and then add desired amount of salt, pepper, and paprika. Mix.


Pour the mixture onto a baking sheet.


Bake for 15-20 minutes. 


And your salty, crunchy snack is ready.


This can easily be experimented with different kinds of flavors. And this snack is extremely healthy, so you don't even have to feel guilty for eating the entire batch! 


Earlier this week, I made a vegan, whole wheat chocolate chip cookie in less than 10 minutes (cooking time included). Intrigued? I will feature the recipe soon. :)

Thursday, February 24, 2011

If you think healthy food tastes bad...

...think again!

I love getting reader requests. Especially because it prevents me from having to come up with my own ideas. And this week, I was really feeling the lack of creativity.

Well, until I was requested to make orange chicken. Those of you who frequent my Facebook profile probably saw this request, and probably also assumed I wasn't going to take it seriously.

I thought it would make for a good challenge. Note: I've never tried orange chicken before. Despite that slight issue, I think this dish came out quite well, and it really didn't take long to make!

Vegetarian Orange "Chicken"

Ingredients:
  • 1 box seitan (1 lb)
  • 1-2 tablespoons vegetable oil
  • 2 tablespoons soy sauce
  • ~2 tablespoons orange juice (or juice of 1 orange)
  • 1 tablespoon zest of an orange
  • 1-2 teaspoons lemon juice
  • 1/2 tablespoon minced ginger (or more, if desired)
  • 1 tablespoon minced garlic
  • 1/3 cup rice vinegar
  • 1 cup water
  • salt/pepper
  • optional: crushed chili peppers or chili paste
  • optional: assorted vegetables (I used broccoli and snap peas)
  • optional: substitute tofu for seitan
[Edit: this recipe makes a lot more of the sauce than necessary for one box of seitan. I would suggest using less water if you prefer a less soupy dish. I liked the extra sauce as it added more flavor!]

If eating with rice, prepare the rice beforehand.

Heat oil on the stove and add the seitan. (If using veggies, add those too). 


Add salt and pepper, and saute. Then turn the heat to low. 

In another pot, add the orange juice, lemon juice, water, rice vinegar, and soy sauce and heat on medium-high.


Add the orange zest, ginger, and garlic, and chilis, and bring to a boil.


Stir, and take the pot off the stove. Let cool. To thicken the sauce a bit, I added 1/2 teaspoon of flour. 

Add the sauce to the seitan. 


Serve with brown rice.


I'd say I'm a fan of orange chicken after eating this. 


And it's perfectly healthy. Success!

To conclude, check out the strawberry banana smoothie that I made this afternoon.

Vanilla yogurt, milk, 1/2 frozen banana, a few frozen strawberries, and vanilla protein powder.


Who needs Jamba when you can make your own? :)

Tuesday, February 22, 2011

Never fear!

I have some fitness updates so I think I shall start with that today!

As I mentioned last week, my knee problem came back. I don't know why, but probably because I jump around too much and my right knee wasn't able to handle it. The point is, I've been doing a variety of different forms of exercise for the past week--not just high-impact and aerobic. I've done yoga several times. One of my yoga practices was from a podcast off of Dave Farmar's website. If you are interested in power yoga/"cardio" yoga/yoga that makes you sweat, I definitely recommend checking it out.

When you're doing yoga, you don't realize it, but you're really getting an awesome upper body workout. I didn't realize it until today, when I figured out I could do THIS!


That was really cool/a pleasant surprise. Want to do a handstand? Do yoga. Then you'll be able to (eventually)! Have I convinced you yet?

Another at-home workout I recently found is called BodyRock. This website is updated everyday with a new workout, and the best part is that the workouts require little to no equipment! My roommate and I tried a couple of the workouts, and it was really challenging. I mean, if you take one look at the website, you'll see how hardcore Zuzana (the woman who leads the workouts) looks. 6 pack, much?!?! The only downside is that you need some sort of interval timer (there are some online) to keep you on track to switch exercises. 

Now for the food!

I've always been really intimidated by Indian food. Not eating it, of course, but cooking it. It always seems so complicated! Last week, my mom told me how to make bhajis, which are basically fried vegetable "fritters." It didn't seem so hard, so I decided I'd give it a shot. And of course, I thought I'd make a non-fried version of them. :)

These make a really good snack!

Bhajis aka Vegetable Fritters

Ingredients:
  • 1/2 cup chickpea flour
  • less than 1/2 cup water (but more than 1/4)
  • 1/4 teaspoon turmeric
  • 1/2 teaspoon ground cumin + ground coriander
  • 1/2-1/4 teaspoon salt (depending on desired saltiness) 
  • 2 cloves garlic, finely chopped
  • roughly chopped vegetables of choice (I used mushroom/bell pepper)
  • oil or non-stick spray
  • pinch of chili powder (optional)

In a bowl, mix the flour, spices, and garlic. 


Add the water and mix. The batter will be thick.


Add your roughly chopped veggies.


Mix until they are completely coated in the batter. 


Generously oil the aluminum foil on your baking dish.


Scoop out the battered-cover veggies and place them on the foil. It's okay if there are two or three veggie pieces per scoop!


Bake at 350F for 15-20 minutes.


Little fritters! 


If making Indian food is actually this easy, I don't know why I've been so intimidated. 


If only I'd made some chutney to go with these. I ate them with hot sauce instead...

Monday, February 21, 2011

How to pop your corn.

Hello. If you've experienced problems popping corn, you've come to the right place.

I don't mean this kind of popcorn:


I mean this kind of popcorn:


You know, the kind you can get in the bulk bins. There are two benefits of do-it-yourself popcorn. First, it's healthier. Secondly, you can flavor it however you want. I'd call that a win-win situation.

I've been battling with popcorn for awhile. (Like seriously battling. At least four times I ended up with burnt kernels and NO popped ones. I was sad). I finally got the hang of it last week. Perfect timing, since this week is snack week!!!

Here is the step-by-step tutorial.

Find a pot (deep is better than shallow) and add one teaspoon of a high-heat oil. I recommend coconut oil. Do not use olive oil because it is not a high-heat oil!!! Turn the stove on to medium-high heat.


Wait for the coconut oil to completely melt, then add three kernels of corn.


To prevent the kernels from burning, keep them moving by shaking/stirring the pot around. When the kernels begin to pop, the oil is hot enough. Be careful; these kernels tend to jump pretty high when they pop!

Add the rest of the kernels to the pot. (This may seem like a small amount, but the entire pot fills up after popping).


Keep stirring the pot around, and put a lid on the pot. At this point, the popcorn will go crazy, but just be patient and keep stirring the pot around. When the popping starts to slow, take the pot off the heat, wait for a minute, and then take the lid off.


Season, and then your huge pot of popcorn is ready! You can season it with anything--I used salt and pepper for this batch, but you can even make it sweet by adding cinnamon or cocoa powder. Or if you happen to have it, nutritional yeast is a good addition as well.

I perfectly portioned this out to have a snack for tomorrow, and then ended up eating today's batch and tomorrow's batch. I definitely needed this after teaching TurboKick today. Note to self: consume more calories before teaching. Somehow in the middle of class, I wasn't able to coordinate my movements and cues properly. It was awkward. (What saved me afterwards was coconut water. It is seriously magical).

If you have any recommendations for snacks or perhaps another how-to you'd like to see, do let me know. :)

Sunday, February 20, 2011

Double Chocolate.

If you haven't noticed, I'm on quite the muffin kick these days. I can't help it! They make such perfect snacks and come out perfectly proportioned. I'm all about proportions.

I've declared this week "snack week." This recipe is a great way to start the week.

And if you are looking for ways to use up the bananas that are hidden in the corner of the kitchen that are turning mushy, you've come to the right place.

Double Chocolate Chip Banana Muffins

Believe it or not, these are actually healthy.

Ingredients:
  • 2 very ripe bananas, mashed
  • 1 egg
  • 1/4 cup oil
  • 1/2 cup yogurt (I used vanilla, but plain would work)
  • 1 cup flour (I used spelt; whole wheat or regular would be fine)
  • 1/2 cup oats (I used oat bran because the texture is more similar to flour)
  • 3 heaping teaspoons unsweetened cocoa powder
  • 1/2 cup semi-sweet chocolate chips
  • 1/4 cup brown sugar (very scant!)
  • 1/2 teaspoon cinnamon
  • 1/4 teaspoon salt
  • 1/2 teaspoon baking powder
  • 1/2 teaspoon baking soda

[Note: since I used vanilla yogurt, I added very little sugar. However, if using plain yogurt, you may want to increase the sugar and/or add 1/4 teaspoon vanilla.]

Mix together the dry ingredients (flour, oats, cocoa, cinnamon, brown sugar, salt, baking powder, and baking soda).


Mix together the wet ingredients (mashed banana, egg, oil, and yogurt).


Gradually add the dry to the wet, add the chocolate chips, and spoon into the muffin pan.


Bake at 350F for 30 minutes, or until the knife comes out clean.


I can't even describe how moist and perfectly chocolate-y these are. And of course, they are bursting with banana flavor.


You should experience this for yourself. 


Maybe enhance the eating experience by frosting the muffin with some homemade cream cheese frosting? Yes.

Saturday, February 19, 2011

This is for you guys.

I get comments like these all the time: 

"You are SO healthy. Don't you ever crave unhealthy food?"

"You must be in the best shape of your life."

"What's the fastest way to get a 6 pack, since you already have one?"

Just kidding about that last one.

But I do get comments like those first two frequently. Due to popular demand, I am letting you in on some of my food-related secrets. 

My only rule: don't judge. Okay. Let's get started.

I've mentioned my sweet tooth before, but I've never mentioned how big of a sweet tooth I possess.

S'mores cookies from Trader Joes. Microwave for ~5 seconds and the marshmallow inside explodes out.
Belgian chocolate-filled croissant.
Cream cheese swirled walnut fudge brownie. Made by me, gifted to a friend (after I enjoyed 1/4 of it). 
Homemade cream cheese frosting.
Red velvet cupcakes topped with homemade cream cheese frosting. Gifted to my sister, after enjoying a few for myself.
Need I even explain? I have chocolate stocked up at all times.
And not only do I enjoy my sweet treats, but also my salty unhealthy snacks every so often...

Fried green chilis dipped in ranch dressing.
So now you know my secret: I don't eat healthy all the time. But I do eat healthy most of the time, and make sure to enjoy the few unhealthy treats I do decide to eat. 

It's exciting to eat out once in awhile and order the fried appetizer, or go out for ice cream with friends to socialize. One unhealthy dish won't cancel out the rest of the healthy meals consumed during the day.

I hope this answers your questions. And now that this is out in the open, don't be surprised if you see more sweets in my posts!